Edit 2022-03: MATHEMA, the company I used to work for, created an app to solve this problem. It's called Live Photo Cleaner and is available for free for iPhones and iPads, directly from the AppStore.

Yesterday I got a nice email from Apple saying that I reached 48.9 GB of storage on my 50 GB iCloud Account and it is time to upgrade. To which I said... WAT? It’s not the first time I have this problem. The way iCloud works on an all-connected way has puzzled me many times. But I thought I had fixed this problem before and was good to go for a while.
Ok, let’s go back to the board. I had a look at the storage on my phone and confirmed the issue, pictures & videos are making up 46 GB of this storage.
So let’s have a look at the media types...
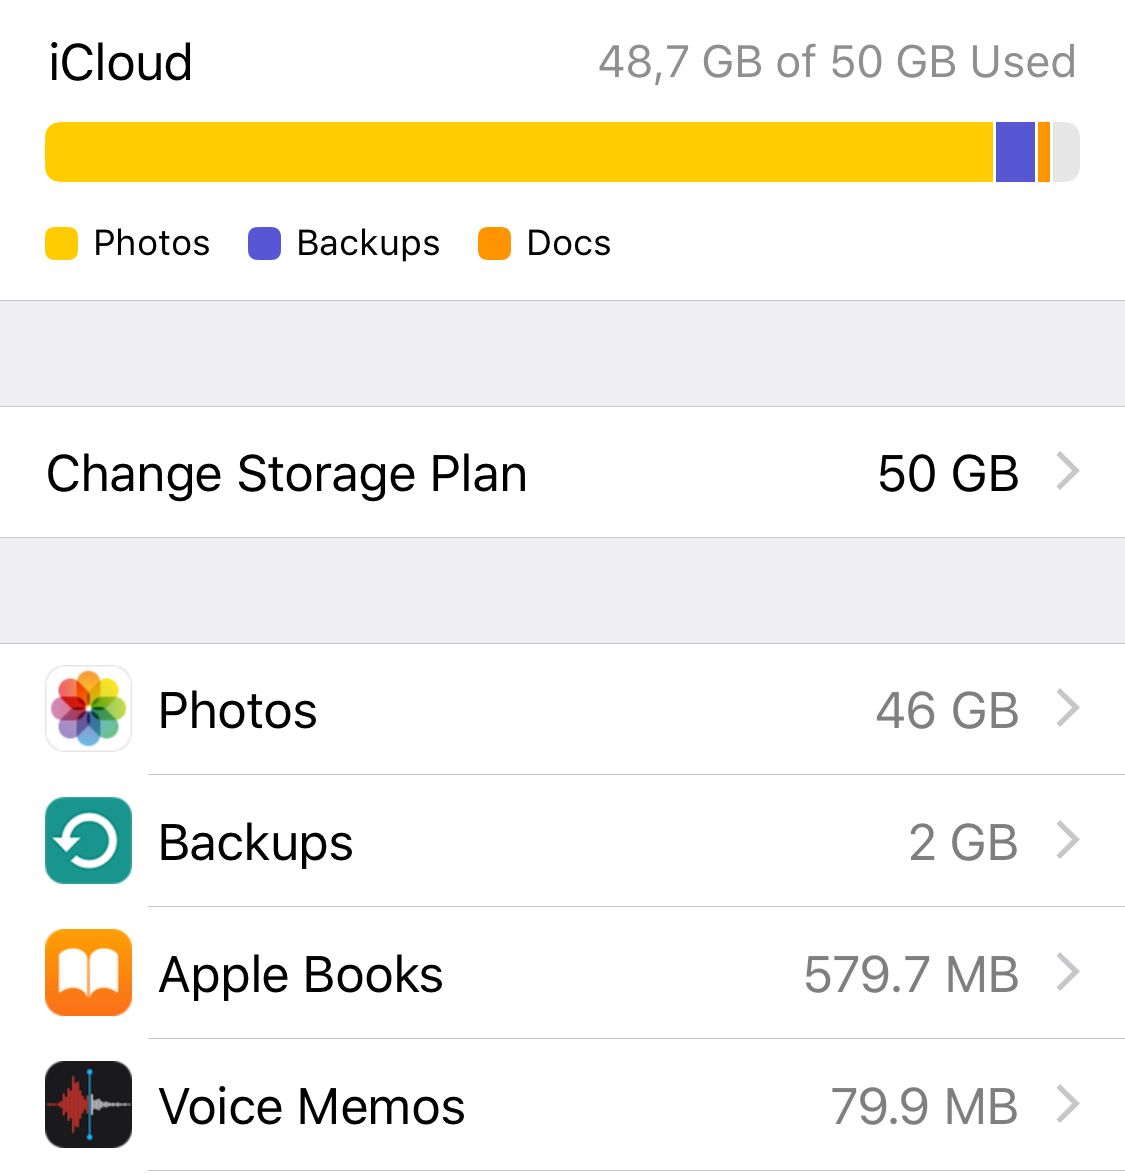
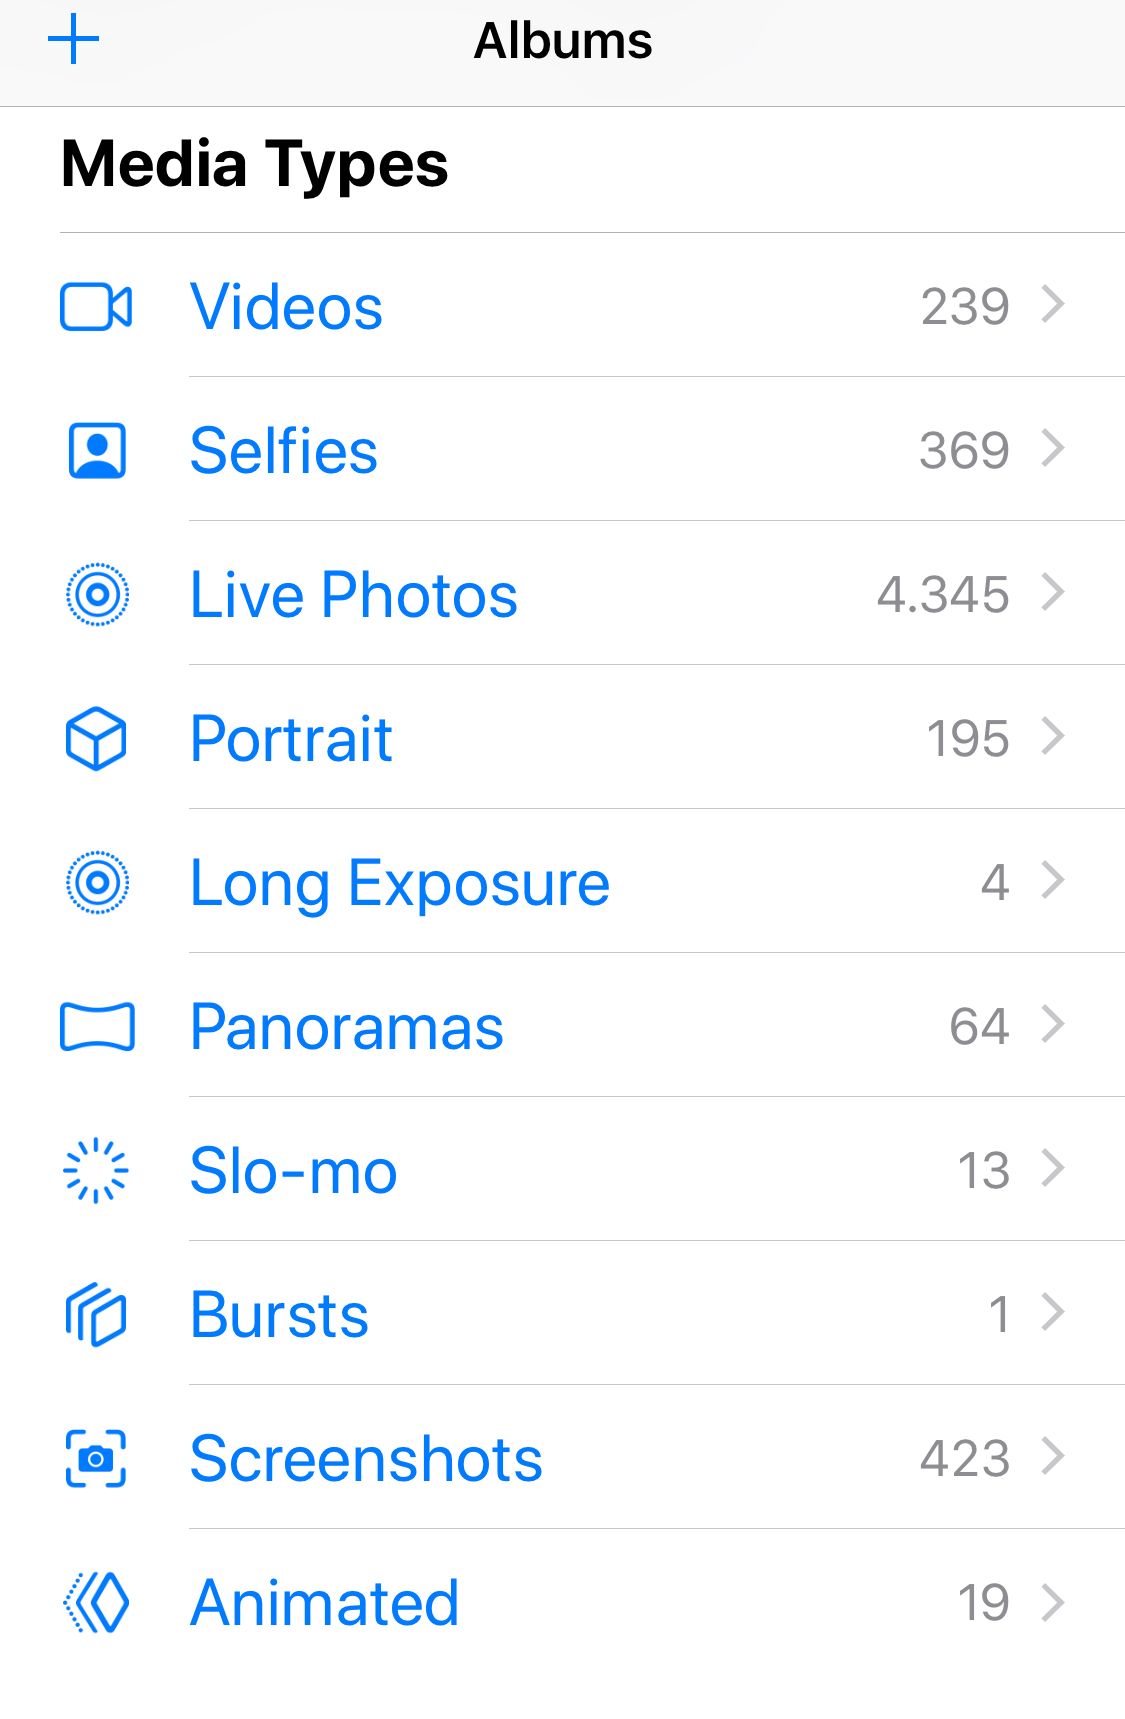
As you can see on the picture above, I have 239 videos and 4345 live-photos (mini-videos) ; and what you cannot see are the 7.000 “simple pictures” on top of that.
So how do we clean this up?
Always delete videos first!
The first action should be to deleting a few videos. One of those can easily take up dozens if not hundreds of megabytes of storage. Focus on deleting the longer ones first.
I personally have a few backup scenarios in place, among which an automatic backup to my Synology NAS, to Google Pictures and an external hard-drive, so I want to keep on iCloud only the videos I would like to access from my phone at any moment. And by “I”, I mean my kids who love to browse old videos from time to time.
I certainly have a few videos to delete, but my focus is elsewhere. I though I had removed all the Live-Photos... what the heck?
The problem with Live-Photos
Live photos were introduced with iOS9 in 2015 along with the iPhone 6S. Those are composed of a still picture and a small video. The video is always about twice the size of the picture. If you need the live picture, fine. But if you keep both and just need the stills, you increase the space taken by a picture by 300%.
Here is the comparison of two images: a still (IMG_4764) and a live-picture (IMG_4763):

I sometimes use those to take picture of moving obj... kids. Kind of like a burst of images, but that starts half a second before you hit the button. I then select one frame and delete the rest.
So we have two tasks:
- Stop the bleeding
- Remove the old stuff
The WRONG solution: Turn-Off Live-Photo
In September 2017, with iOS11, Apple introduced a feature that looks like it would be doing exactly this. Go into edit mode, tap the “live” at the top of the picture, and BOOM, the picture is a still.
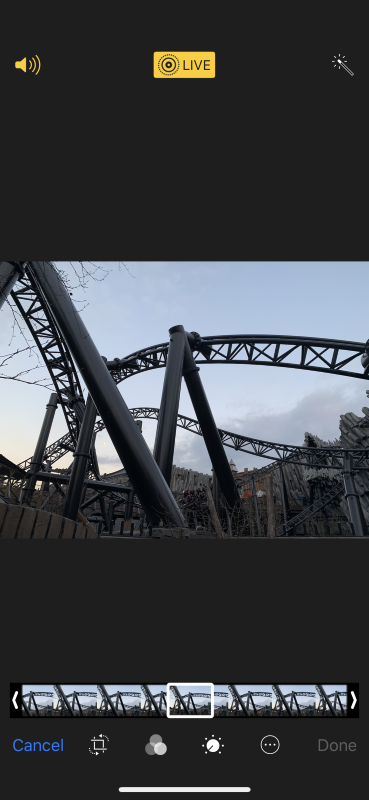
For the past 2 years, I have diligently been doing exactly that. Taking a picture with live enabled. Then selecting a frame and removing the live. And I thought I had solved the problem.
The Problem!
But wait a second, I thought I had removed those live-photos. But in fact, the live was just turned off. Edit a picture again, and you’ll see that you can turn it on again. Which means that the picture is treated as a still picture, but the live part is still there somewhere, taking space. If you search online, you will rarely see this last information. So for the past two years, I have diligently been doing... nothing. Great.
“Duplicate as still and delete” approach
The only reliable way to get rid of the live photos is to duplicate the image as a still picture, and delete the original. Here's how you do it manually:
- select one or more live-photos
- duplicate them as stills
- delete the originals
Here are the detailed steps:
- Open the live-photos album
- Select the pictures you want
- Hit the share icon on the bottom left and then duplicate
- Hit “duplicate as still photos”
- Potentially wait for the app to download the photos if you setup iCloud to unload older images automatically
- Select the same pictures again (that’s why it is important to be in the live photos album)
- Delete them
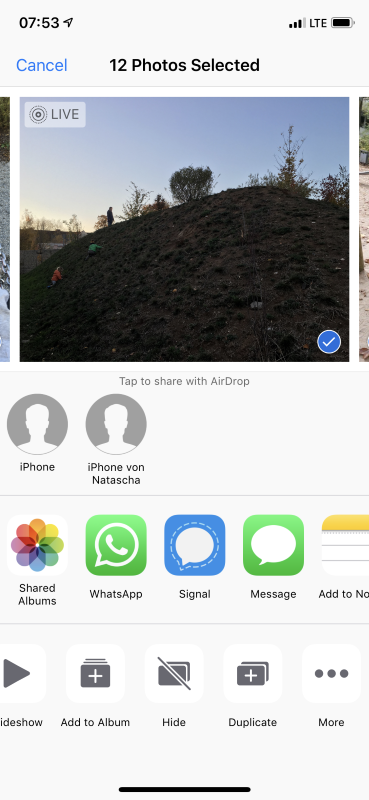
I tested this on about 80 live pictures-so-far and found a few good and not so good side effects:
- First of all, the pictures are not deleted right away, they land in the “Deleted” album. The good part is: you can still recover them for 30 days. The bad part is: the storage space is not freed up right away.
- The duplicated picture contains all the same meta-data so you will find it at the exact same place if you sort per date or geo-location for instance.
- That said, the duplication doesn’t retain the album link. So if your live-photo was in an album, the duplicated picture will not be there.
- Live-pictures can be edited with an effect, to bounce, loop and blur a long exposure for example. Those cannot be duplicated as stills. If you select many pictures and have one of those in there, the context menu “duplicate as still photo” will not be shown. Instead, the OS will duplicate all the pictures right away... as live pictures. You will then have to remove all the duplicates per hand. You should first have a look at the “Animated” and “Long Exposure” albums that iOS created for you. You will find those pictures in there and can preemptively delete them or recognize them and try to remember them for later.
- If you setup iCloud to unload older images automatically, you will have to download them all again to duplicate them. This is usually not a problem if you select one or two pictures. But it can become thorny if you select more at once. So better do this cleanup on a reliable wifi connection.
- Edit 2020-09-16: there is one more side effects that I couldn't resolve. The "Recent" album in the Photos app doesn't handle this duplication correctly. Even though the metadata of the picture are correct, it will display all the duplicated photo as if it was new. I suppose this is as per design.

I cannot say how much space was really saved by this action yet. The statistics are not granular enough. The storage for picture and videos used to be 46 GB. After deleting 100 live pictures (and deleting them from the “deleted” album) it is 45,9 GB, which is what was supposed to happen (~1.x MB / picture * 100 = 100 MB of storage freed). I have yet to do it for the remaining of my 4000+ live photos.
If you find another side-effect or if you know a better/alternative way to do this, please leave a comment below!
Edit 2019.09.10
Some of you pointed out that there is an app to do this: Lean. The App is supposed to do exactly this and only this: remove the live picture while keeping the still with all its metadata. So basically do that manual scenario for you. I tried it and faced only problems.
- First, it doesn’t seem to be able to preview “turned-off Live-Pictures” (see below). So 90% of my pictures are displayed as a big white square.
- Then when I attempt to delete one of those, it says “success, freed up 0 MB”. Which is not really what I would interpret as a success.
- Finally, as soon as I select more than one picture, I get an error claiming that there is not enough storage space. And then deleting single images doesn’t work anymore either.
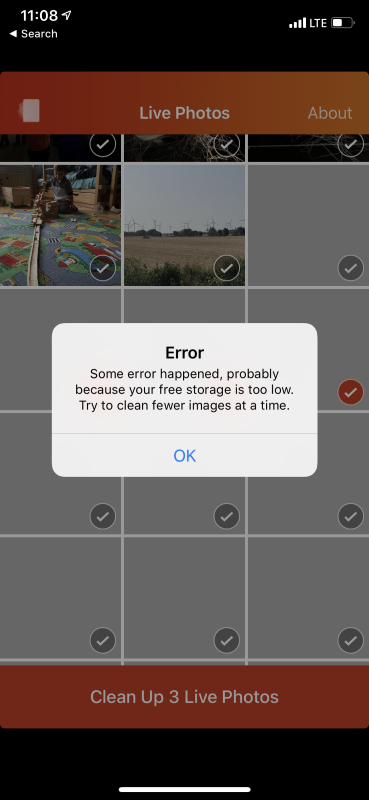
Too bad, it was a great idea.
Edit 2019.10.7
I finally pulled it through manually (using the iOS duplication feature). The multi-selection changes of iOS13 made it easier to select 100 pictures at a time. The result of this cleanup is a drop from 46 GB to 35.6 GB for the "Photos" storage. So it works exactly as intended.
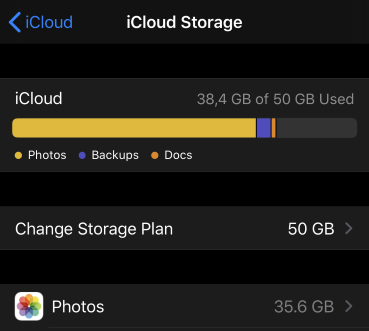
The only "problem" is that my Google Photo backup didn't really understand what was happening and re-imported all the pictures.
Edit 2021.07.02
I've been working on a new app with my company. Stay tuned for a solution to this problem soon.
Edit 2022.01.01
The App is available. It's called Live Photo Cleaner and is available for free via: https://livephotocleaner.app/
Photo by Alice Donovan Rouse on Unsplash


